Replacing a vertical list of characters with a sequence of numbers in VIM

During my spare time, I try to learn C. Often I find myself having to create arrays, and fill these with data manually. Since I hate, and let me emphasize, hate, doing repetitive tasks, I wanted to show you guys how to create an array with 6 elements as simple as possible.

Consider the following; you want to create an array of strings with 6 elements, where each element can hold a maximum of 25 characters. Hence, you type the following:

#include <stdio.h>

int main(int argc, char argv[])
{
char my_array[6][26];

strcpy(my_array[0], "Something");
strcpy(my_array[1], "Something else");
strcpy(my_array[2], "Something different");
// etcetera

return 1;
}

Now, that wasn’t very tiresome, but what if you had to enter 10 elements, or even 50? Typing strcpy(my_array[x], “blahblah”); that many times can even make the most patient person go nuts. If you’re a VIM user, this process can however be simplified quite a bit.

First, start VIM. Next, type ‘strcpy(my_array[x], “”‘);’, and yank this line by pressing ‘yy’. Now, to repeat this process 5 times, simply type “5p”. You should now have 6 lines containing:

strcpy(my_array[x], "");

The final step is now to replace all the x characters with a sequence of numbers, ranging from 0 to 5. By using the Nexus plugin, located here, you can do this with one neat command.

With the plugin installed, replace the first occurance of ‘x’ with 0. Then, enter Visual Block Mode (C v), and select the remaining x characters. Now, enter the command: :’< ,'>s/\%V./\=s1.next()/, and all the x characteres is replaced with a sequence of numbers, ranging from 1 to 5. You should now have:

strcpy(my_array[0], "");
strcpy(my_array[1], "");
strcpy(my_array[2], "");
strcpy(my_array[3], "");
strcpy(my_array[4], "");
strcpy(my_array[5], "");

Neat, huh? If you want to perform the task again, you will see that s1 continues from where it stopped in the above example. To reset the s1 variable, run ‘:call s1.reset()’.
Configure sendmail as an MTA relay on Slackware

My landlord recently changed to a different ISP that blocks all outgoing requests on port 25, except towards their own SMTP-server. After getting my hands dirty by plowing throgh the sendmail documentation, located here, I figured out that it wasn’t very difficult to configure sendmail to relay all outgoing e-mails towards this server, thus solving the entire problem.

If you want all outgoing mail to go to a central relay site, define SMART_HOST.

I started by checking the sendmail configuration file, /etc/mail/sendmail.cf, that strictly specified “DO NOT EDIT THIS FILE!  Only edit the source .mc file.“. Following this advice, I had to figure out where this .mc file was located.

I did a quick search for all files containing sendmail and cf on my local system, and discovered “/usr/share/sendmail/cf/cf/sendmail-slackware.mc“. That was indeed the correct file, and I simply added “define(`SMART_HOST’, `smtp.online.no’)“. To see the entire configuration file, expand the spoiler below.

Spoiler Inside: modified sendmail-slackware.mc SelectShow

Once that was done, I had to compile the configuration file with “m4 /usr/share/sendmail/cf/cf/my-sendmail.slackware.mc > /etc/mail/sendmail.cf“, and restart inetd and sendmail by running /etc/rc.d/rc.inetd restart && /etc/rc.d/rc.sendmail restart.

Problem solved, and I’m receiving my emails again!

Getting cmus to cooperate with conky

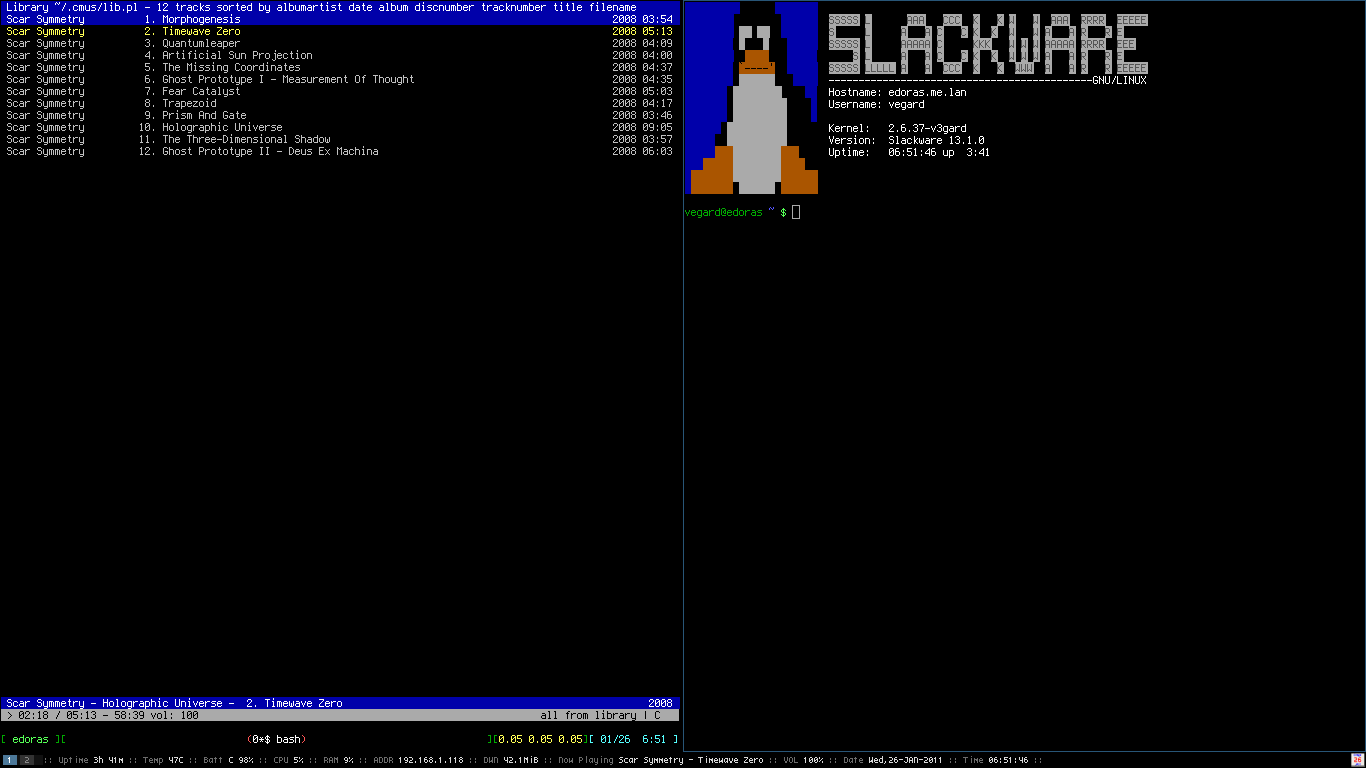
Screenshot of My Current Desktop

cmus is a small, fast and powerful console music player for Linux and *BSD. If you also happen to use conky, the light-weight system monitor, grabbing data from cmus and rendering it in conky is a piece of cake!

cmus comes with an application called cmus-remote that allows you to control the music player from a remote location. We’re now gonna use this app to grab the metadata and make it accessible to conky.

Since conky doesn’t have a plugin for accessing cmus directly, we need to write a simple shell script:

if [ ! -x /usr/bin/cmus-remote ];
then
echo "cmus is not installed."
exit
fi

ARTIST=$( cmus-remote -Q 2>/dev/null | grep artist | cut -d " " -f 3- )
TITLE=$( cmus-remote -Q 2>/dev/null | grep title | cut -d " " -f 3- )

if [ -z "$ARTIST" ];
then
echo "Nothing"
else
echo "$ARTIST - $TITLE"
fi

If you have a song currently being played in cmus, you can run the script shown above in your favorite terminal, and something like “Scar Symmetry – Trapezoid” will be returned.

To get the information displayed in your conky bar, you can add the following somewhere in your .conkyrc:

${execi 2 /path/to/script}

To see an example of how a rendered bar looks like, check out the screenshot of my current desktop. I’m using the i3 window manager, and the output from conky is rendered using a combination of i3-wsbar and dzen2.

My .conkyrc is available here, and you can download the cmus-conky-script here.

Identifying skimming equipment


Skimming
Illustration of someone attaching skimming equipment to an ATM. Image courtesy of BBC News.

Almost every week I make notice of articles in the national newspapers that someone has become victim of ATM fraud, or skimming. Usually, the article describes where the event took place and issues a warning that you should contact your bank if you suspect that you have been victim to such crimes.

One thing that bothers me about this, is that neither the media or even the banks here in Norway publish any information about how one can detect skimming equipment, so you can avoid having your VISA card scanned (or your pin code video taped) in the first place.

By doing some research, I found out that a bank in Australia (!) has published information on how to spot if an ATM has been modified, with images of how it looks like both with and without the skimming equipment attached. My first impression is that the material is both informative and easy to follow.

Once you read through the PDF, you should be more fit to avoid being victim of card skimming in the future! 🙂

In addition, I would recommend that you examine the ATM every time before you use it. If anything seems out of the ordinary, see if you are able to move any loose panels around. You do not have anything to loose, except your money.

Install Android 2.2 (Froyo) on your HTC Magic

Image of the HTC Magic
HTC Magic – Image courtesy of HTC.

Did you know that it is possible to upgrade your HTC Magic to use the newest version of Android? Doing so significantly increases the phone’s performance and reliability – in addition to give you access to awesome applications like chrometophone.

Last year I bought a HTC Magic (aka Sapphire). At the time, the phone shipped with Android 1.5, while the most recent version of Android at the time was 1.6. Since there was no official update available from HTC, I decided to try out one of the community-based ROMs.

After conducting some research, I settled for a project called CyanogenMod – mainly because it offered increased reliability and performance. By following the necessary steps for upgrading the HTC Magic, I managed to install the ROM and have Android 1.6 available on my phone. It wasn’t very difficult either. You basically:

  • Download the CyanogenMod ROM and  the corresponding kernel image. You also need a recovery ROM (for installing CyanogenMod and the kernel)
  • Copy CyanogenMod and the kernel over to the phone’s SD card.
  • Use the Android SDK (or fastboot) to boot the custom recovery ROM you downloaded earlier.
  • (Backup your existing ROM with Nandroid)
  • Install CyanogenMod and the kernel from the SD card
  • Reboot
CyanogenMod Logo
CyanogenMod Logo

CyanogenMod held its promise. The phone became much more responsive and reliable than earlier, and with the phone rooted, I also had the option to install applications that was unavailable to me before.

Now, a year later, I have installed Android 2.2 (Froyo) on the phone (by following the same steps as described above). Compared to the initial ROM that shipped with the phone a year ago, the performance is MUCH better. You also have multitouch functionality (like pinching and zooming), and you have access to the Android Cloud to Device Messaging (C2DM) framework (which lets you install chrometophone).

If you have a HTC Magic (or a similar Android device), you should install CyanogenMod. You won’t regret it.

Major update!

It has been over a year since my last post. For this reason, I have finally figured out that I have to switch to a mainstream CMS that makes it easier for me to publish updates.

During the last few years, I have tried keeping my old CMS, mbmCMS (or madebymyselfCMS) updated, but I had to throw in the towel in the end. Maintaining a CMS is a lot of work, and I really didn’t enjoy (or have the time) working on it anymore. Over the years, the code base had become quite bad, as I really didn’t organize the code very well.

WordPress on the other hand looks like its up for the task. The admin dashboard is a dream to work with, and I don’t have to make my own plug-ins. Hopefully, this will make it easier to keep the site updated.

I have already moved over the articles I found relevant from the old site, and I will possibly add a few more over the next days.

Remember to check out my other sites!

Vegard

Using Dropbox on Slackware

This guide will show you how to install Droxbox on a system that doesn’t have Nautilus installed. This is especially useful to people who use Slackware, because GNOME is not installed by default. You still need a file manager though, so in this example, we’ll use Thunar.

In order to get Dropbox to work, we have to trick Dropbox into thinking that Nautilus is already installed. The easiest way to accomplish this, is by creating a script in /usr/bin called nautilus, which basically is a link to Thunar. To get started, download a precompiled binary from getdropbox.com. I used a binary compiled for Fedora 10 called nautilus-dropbox-0.6.1-1.fc10.i386.rpm.

$ wget http://linux.getdropbox.com/packages/nautilus-dropbox-0.6.1-1.fc10.i386.rpm

What we now are going to do is to run rpm2tgz on this package so that we can explode the package using explodepkg. We do so because we want to create a slackware-package, where we also include our little workaround. First, log in as root.

$ su -
$ mkdir /tmp/dropbox
$ mv nautilus-dropbox-0.6.1-1.fc10.i386.rpm /tmp/dropbox
$ rpm2tgz nautilus-dropbox-0.6.1-1.fc10.i386.rpm
$ explodepkg nautilus-dropbox-0.6.1-1.fc10.i386.tgz

Now, go to /tmp/dropbox/usr/bin, fire up your favorite text-editor and write the following:

#!/bin/bash
thunar $@
exit 0

When you’re done, save the file as “nautilus”. Now, go back to /tmp/dropbox, create a folder called install, touch a file called “slack-desc” and run makepkg to create a slackware-package.

$ mkdir install
$ touch install/slack-desc
$ makepkg dropbox-0.6.1-i386-1vh.tgz

The only thing that has to be done now, is to install the package.

$ installpkg dropbox-0.6.1-i386-1vh.tgz

Special keys stops working while using VMware

Has it occured to you that when you’re using VMware Workstation or Server that CTRL, ALT and SHIFT stops working? When this first started happening to me, I just restarted X to fix the problem. As you probably know, this is not a good solution

If you however try executing setxkbmap once this problem occurs, you should gain control over the keys again. This did at least work for me 🙂

New kernel resulted in massive audio problems

Today I upgraded my current kernel (2.6.24) to the newest, 2.6.25 and also made some minor changes to the config-file. I added some new options, and removed a few I thought was unnecessary.

After the new kernel compiled successfully, I moved the image to /boot and configured lilo. Then, I did a quick reboot and everything worked fine, or so I thought.

I compiled the kernel while I was attending a rather boring lecture at school, and I didn’t have the opportunity to check how the whole system worked until I got home. When I finally got home, I had to relax a bit so I put on some music. To my surprise, Audacious returned an error saying it couldn’t access the sound-device. I then checked the rights on every file related to sound in /dev, and everything seemed to be in order. Then, I tried reconfiguring ALSA by running alsa-conf, but neither that seemed to do the trick.

My last resort before googling for an answer was checking the audio-tab under preferences in Audacious. Making sure that “Current output plug-in” was set to ALSA 1.3.5, I clicked the button “Output Plugin Preferences” and noticed that the current audio-device was set to “default”. I tried switching to one of the other fields in the combobox (Intel ICH6: xxx), and guess what. Audacious finally worked again.

Since I now was able to play audio without problems, I settled for using this workaround – at least until I tried playing a movie through MPlayer. When I attemped to watch a movie, I got the error-message “X11 error: BadAccess (attempt to access private resource denied)” slammed in my face. I also tried running gmplayer – which refused to start and returned the error-message “Fatal Error! – [ws] shared memory extension error.”. Now I realized that something was very wrong. Using my wits, I determined that the issue had to be with the newly compiled kernel. I ran a “make menuconfig” and tried to locate any misconfigurations.. ..although without results.

I was now out of ideas and went on to the last resort and googled the error-message outputted by gmplayer along with “kernel”. A few minutes and 4 webpages later, I found the solution to the problem.

While I was configuring the new kernel, I had disabled “System V IPC” (CONFIG_SYSVIPC), which is located under “General Setup”. I remember reading the help-message before I disabled this option and it didn’t look very important. It stated that some programs, like “dosemu” wouldn’t work unless this was turned on. Since I don’t use dosemu, but dosbox instead, I thought I wouldn’t be needing it and therefore left it out.

However, I was very wrong and from now on,  I will always compile my new kernels where I’ll include CONFIG_SYSVIPC. And yes, when the new kernel was compiled yet again, I booted it and everything worked like it used to.